Introduction to the software and how to use it
Below is a simplified description on how to test the basic functionality of the program:
Importing fiscal information
Start a new case by entering the org.nr for a company and hover your mouse over "Importera / Import". Import is done via a multitude of integrations such as UC, SIE, Monto, Asteria, and others. We display different import choices for different banks depending on their needs. You can also enter all the data manually.
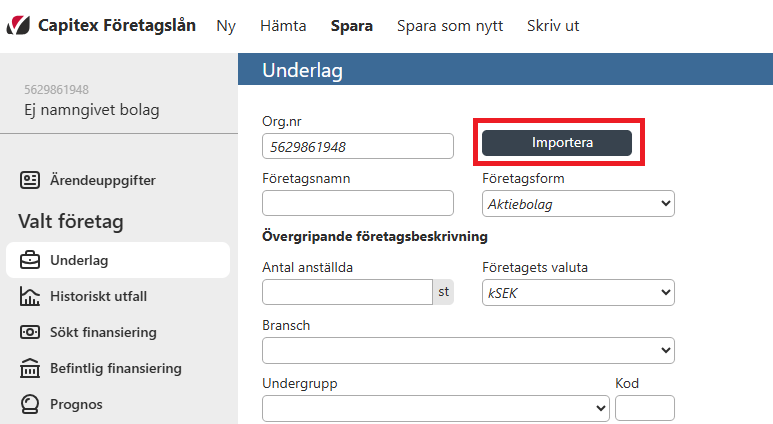
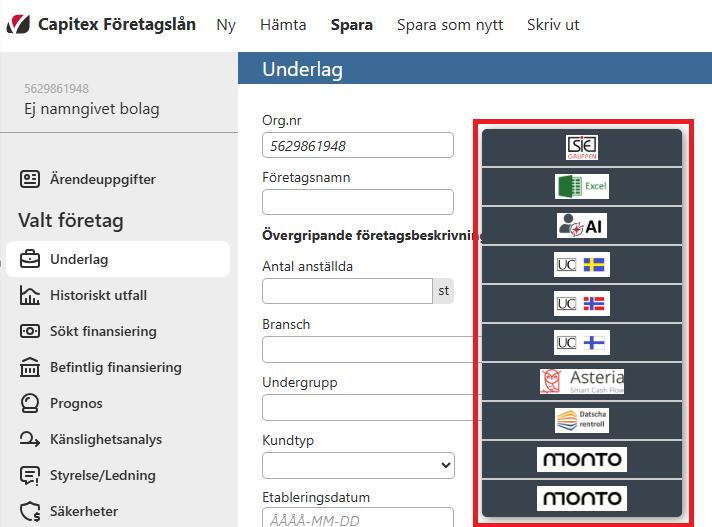
In this example we selected to import via UC.
Viewing and editing the fiscal information
After importing, we can go to the page “Historiskt utfall / Actuals” to view the imported data per fiscal year as well as editing the data. In this example, the UC import only contained data for the years 2023 and 2024:
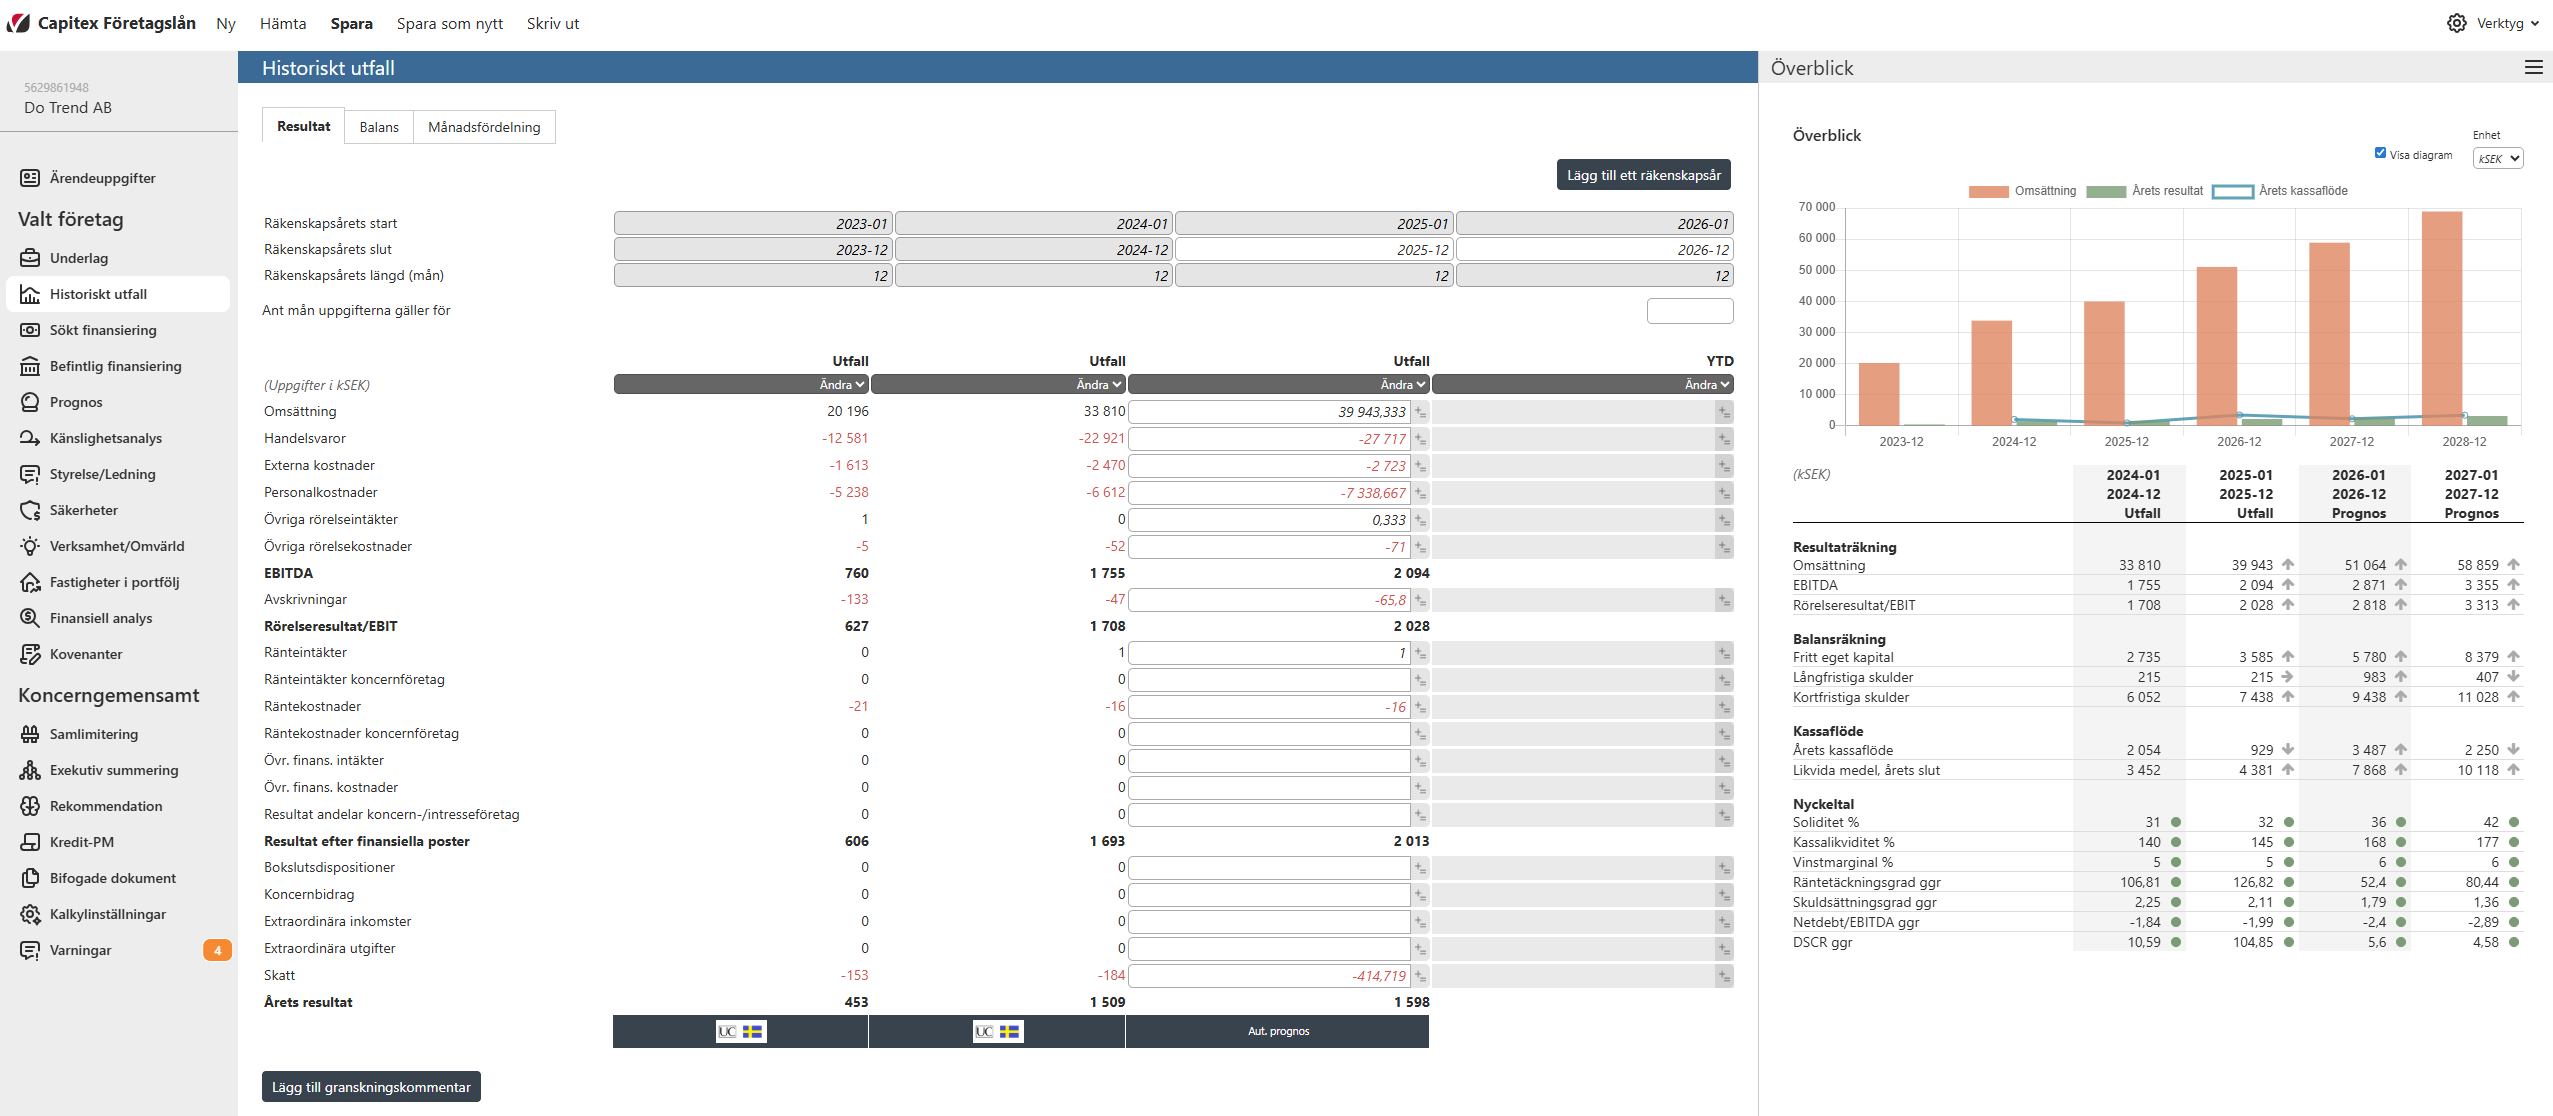
In order to add the fiscal information for 2025 and the YTD-year 2026 we can either enter the data manually, or by requesting and then importing SIE-files from the company for the missing years, or by creating an automatic forecast for the missing years (which is what we have done for the year 2025 in this example). Further information about forecasts will be provided later in the manual.
As we are navigating through the application, notice that there is one view on the left-hand side of the screen displaying what page we are on, and also one view on the right-hand side of the screen which is displaying what we call “Result views”. There are many different selectable result views that show you different relevant information about the case, right now the default result view “Överblick / Overview” is selected which shows various key figures about the company. The result views are updated continuously as you enter data in the various pages of the application.
All pages and result views will be explained in further detail later on in the manual (see chapters “Pages / Process steps - the left hand navigation column in the program” and “Result views - tabs on the right side of the application”).
Sökt finansiering / Applied financing
In order to enter information about applied financing, select the page “Sökt finansiering / Applied financing”. In this example we have added a simple financing of 1,200 kSEK with a nominal interest rate of 5% and a due date two years after the payment date (note that the prefix and currency of all entered value can be changed on the page “Underlag / Basis” and is right now set to kSEK).
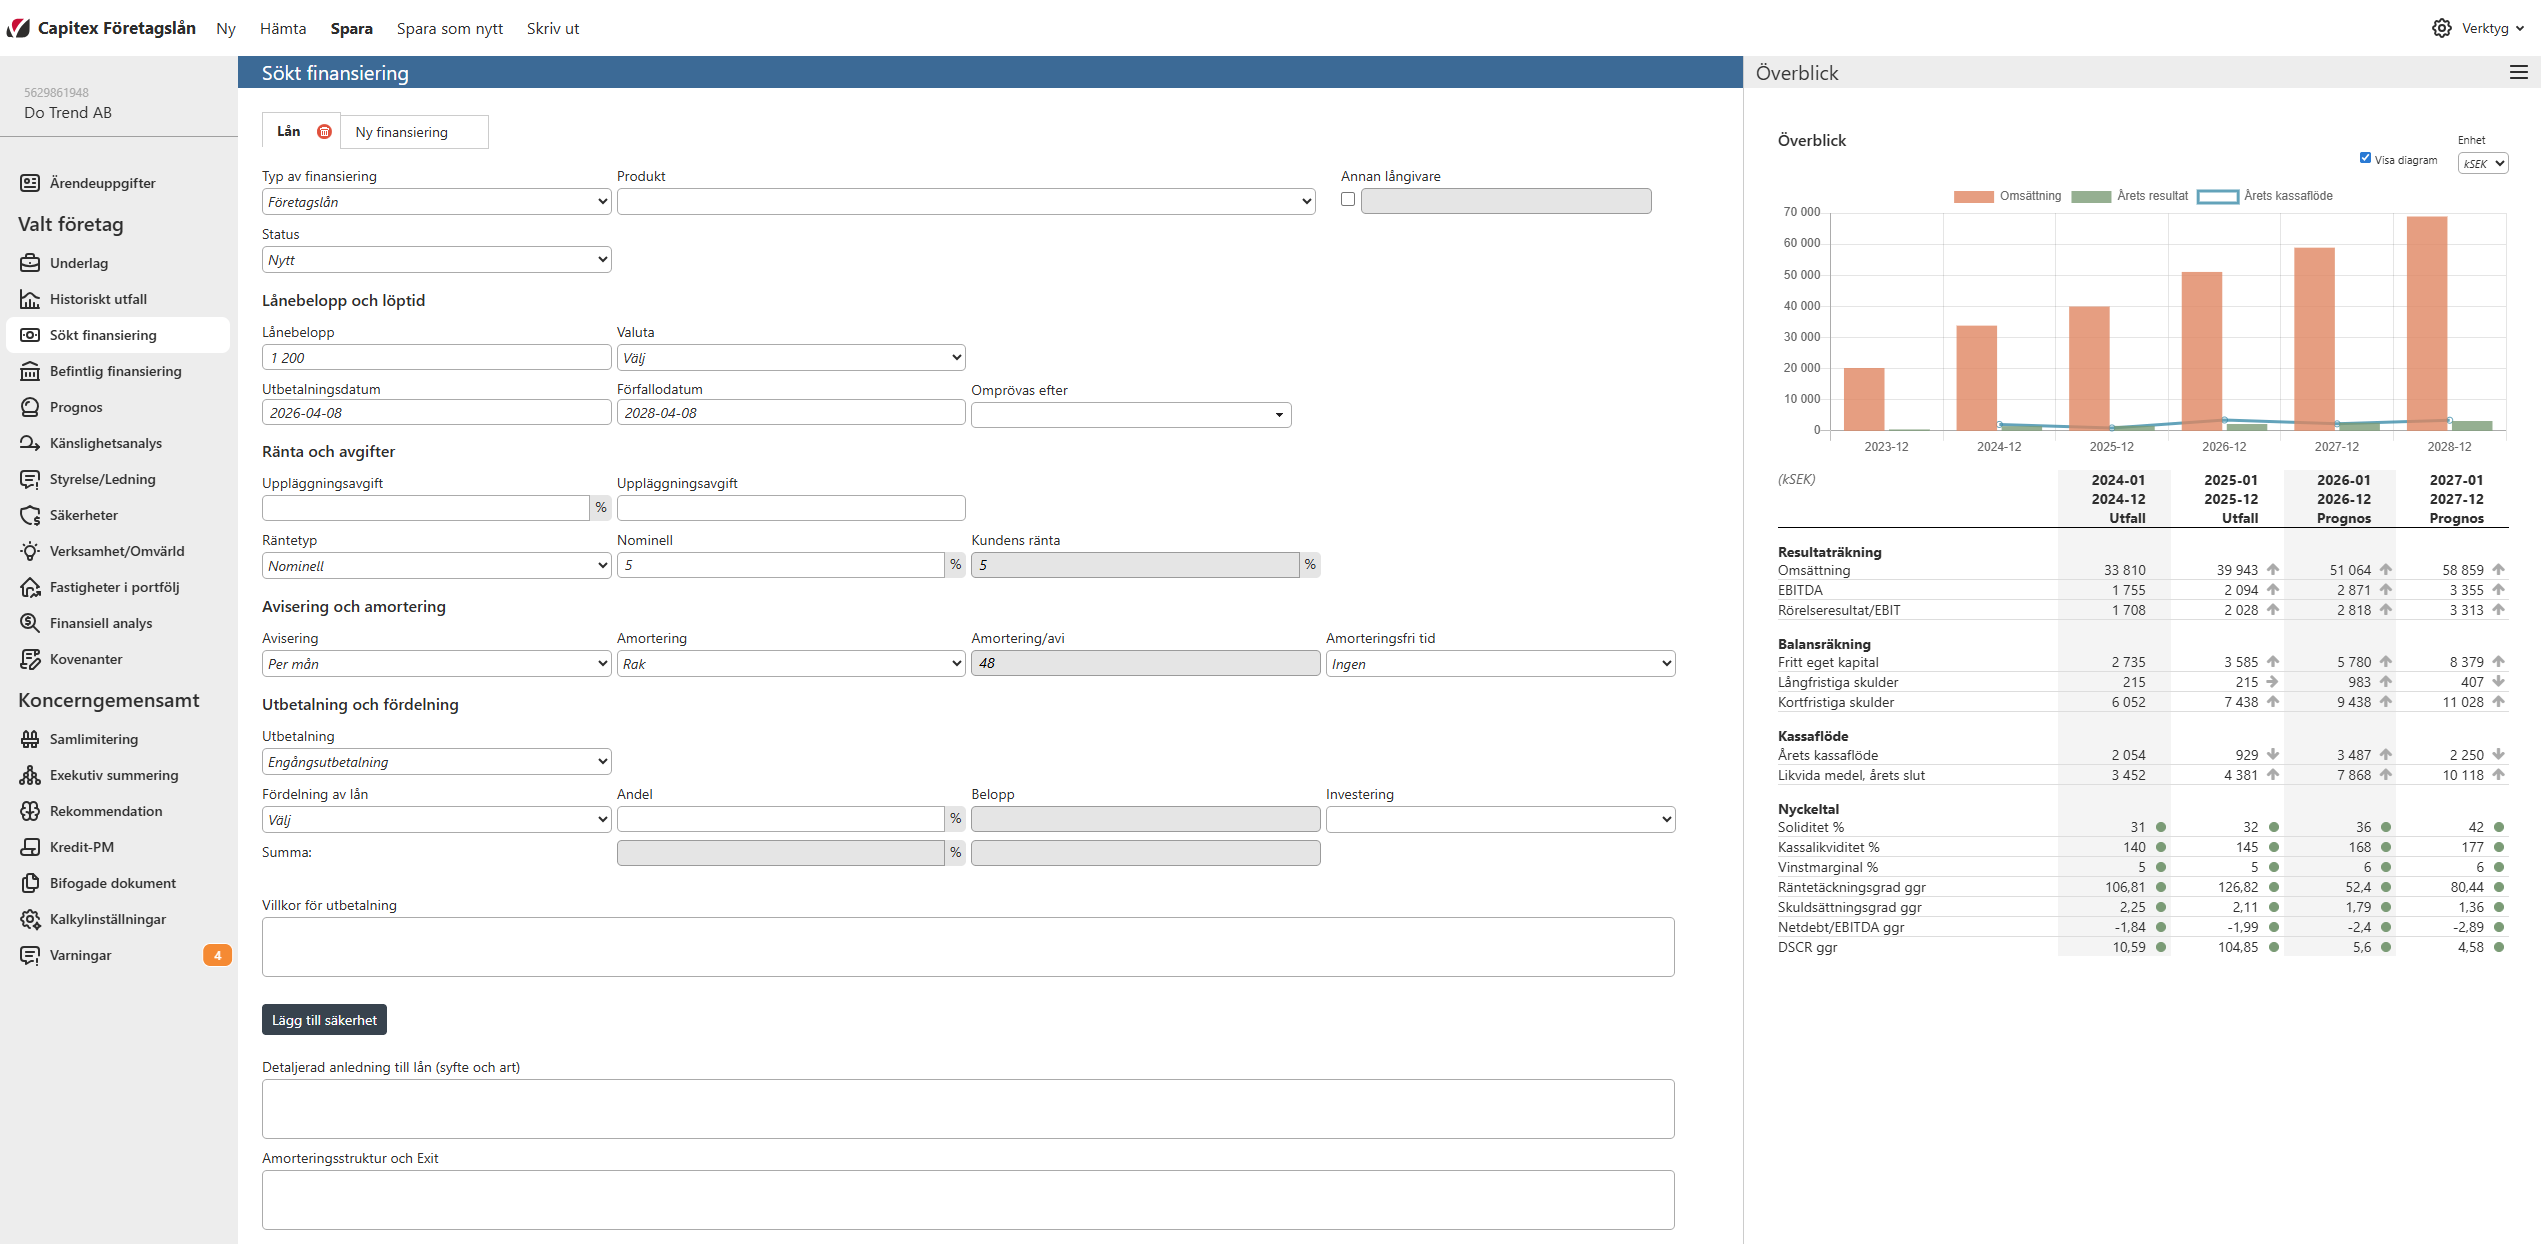
As we enter or update information about the applied financing and historical fiscal information, a forecast is made. This forecast is visible on the “Överblick / Overview” result view. In order to interact with the forecast, we must visit the “Prognos / Forecast” page.
Prognos / Forecast
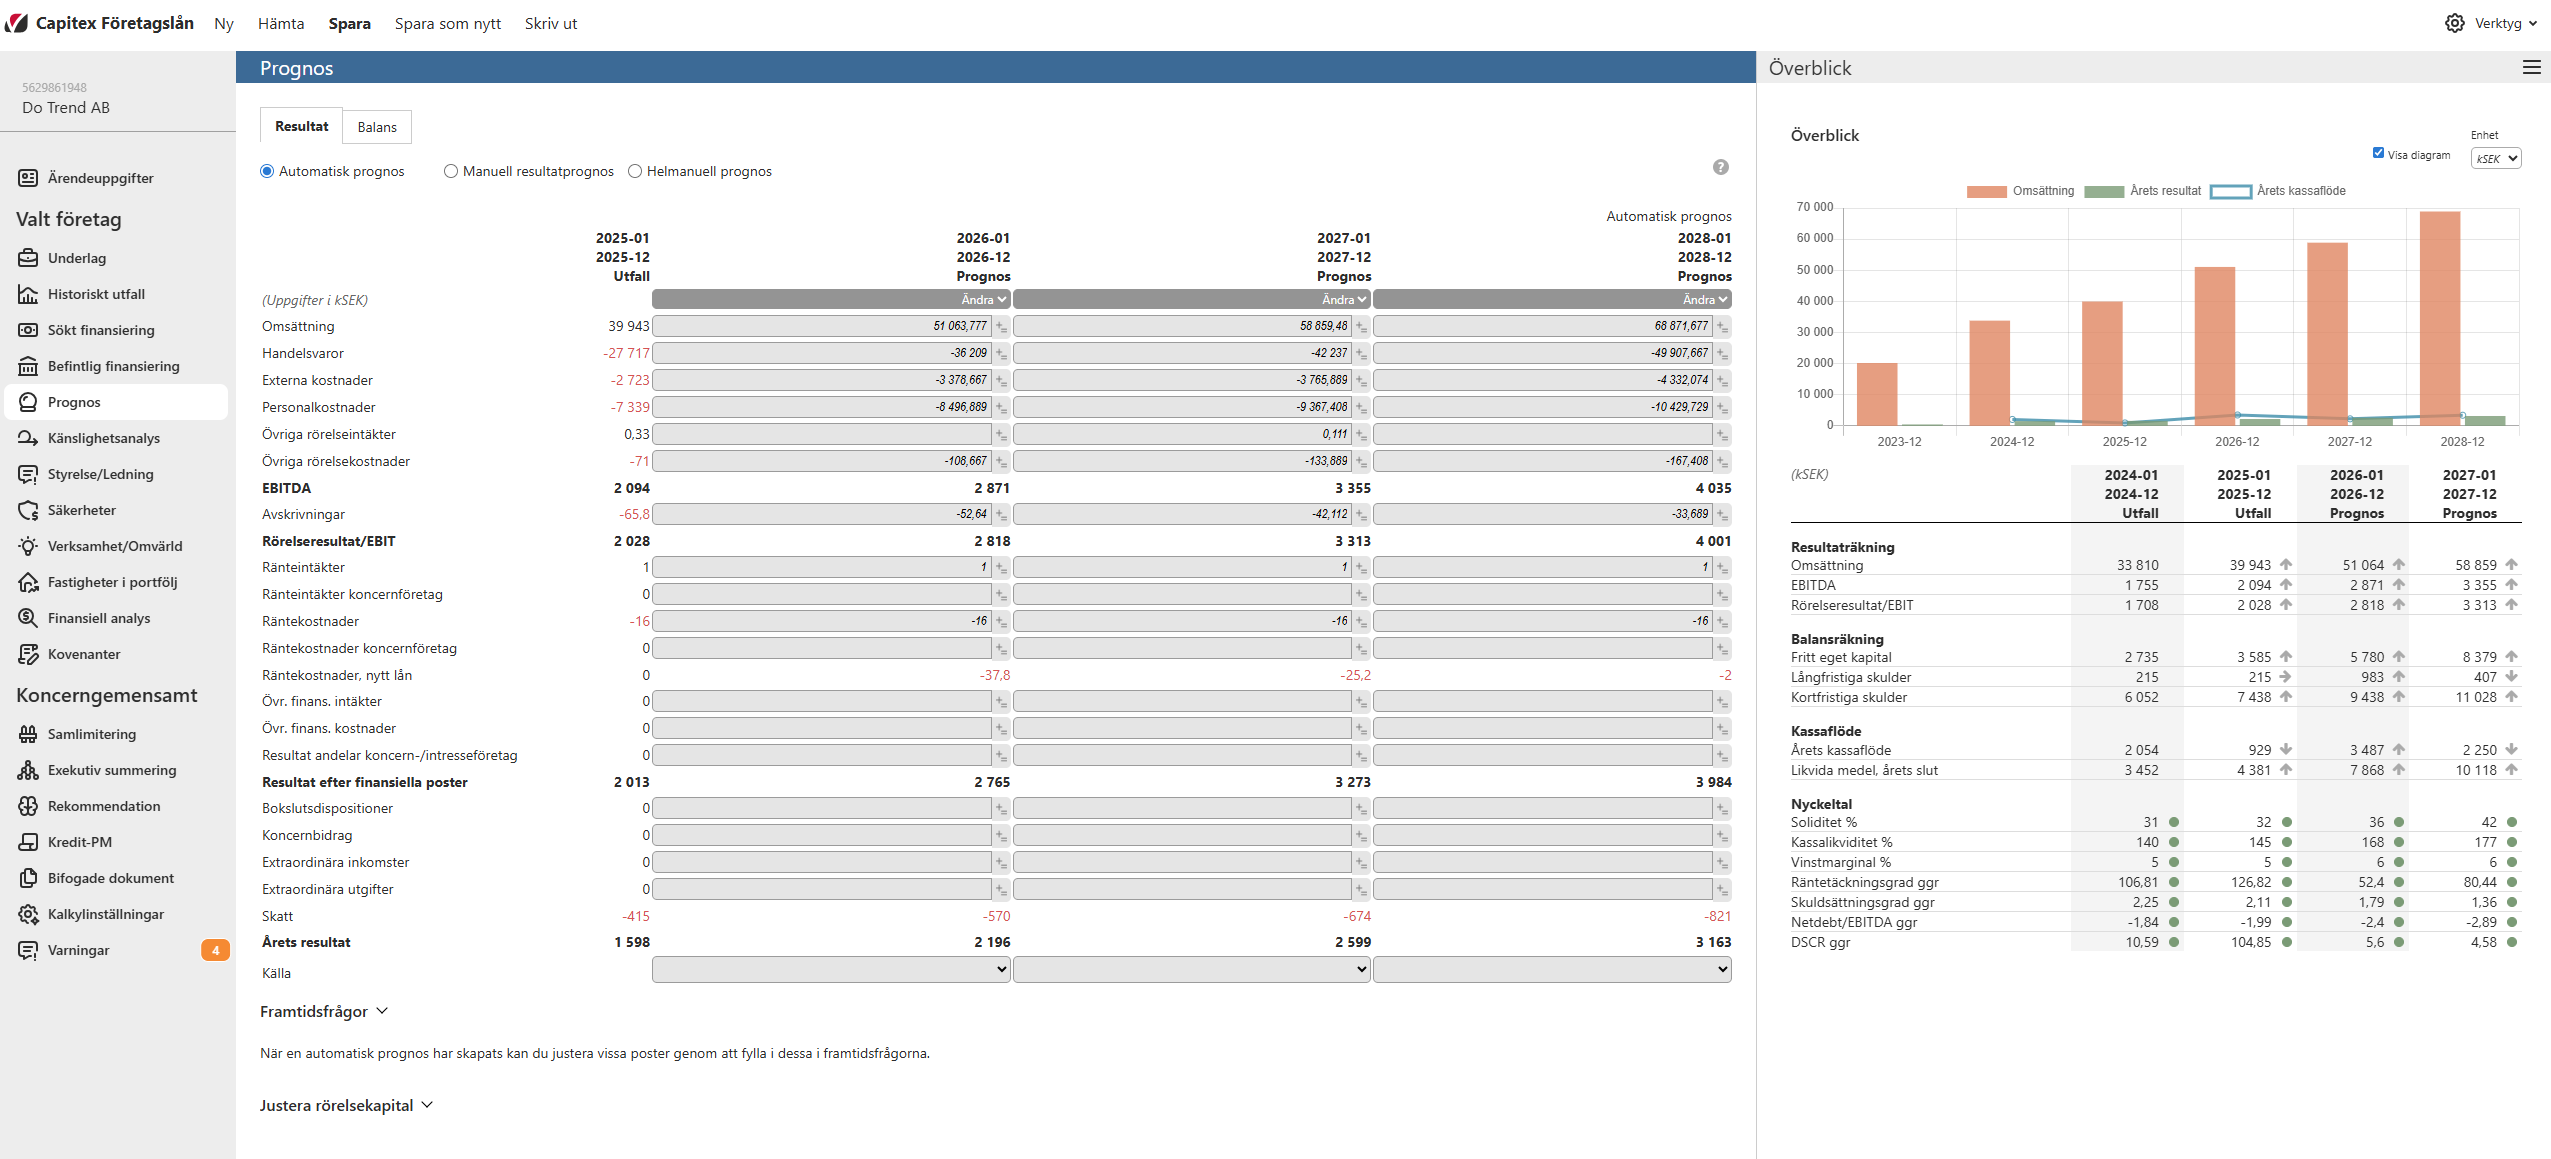
On the “Prognos / Forecast” page, there are three different forecast modes available:
Automatisk prognos / Automatic forecast - calculated a forecast automatically based on the data available in the case.
Manuell resultatprognos / Manual results forecast - calculates the forecast for the balance sheet automatically in the same manner as the Automatic forecast, but lets the user input the forecast for the income statement manually.
Helmanuell prognos / Fully manual forecast - allows the user to manually input the forecast for both the income statement and the balance sheet.
In this example we have selected the Automatic forecast:
Kredit-PM / Credit PM
As we are entering information about the case, a Credit PM is constantly being updated. The Credit PM can be viewed under the page “Kredit-PM / Credit PM”:
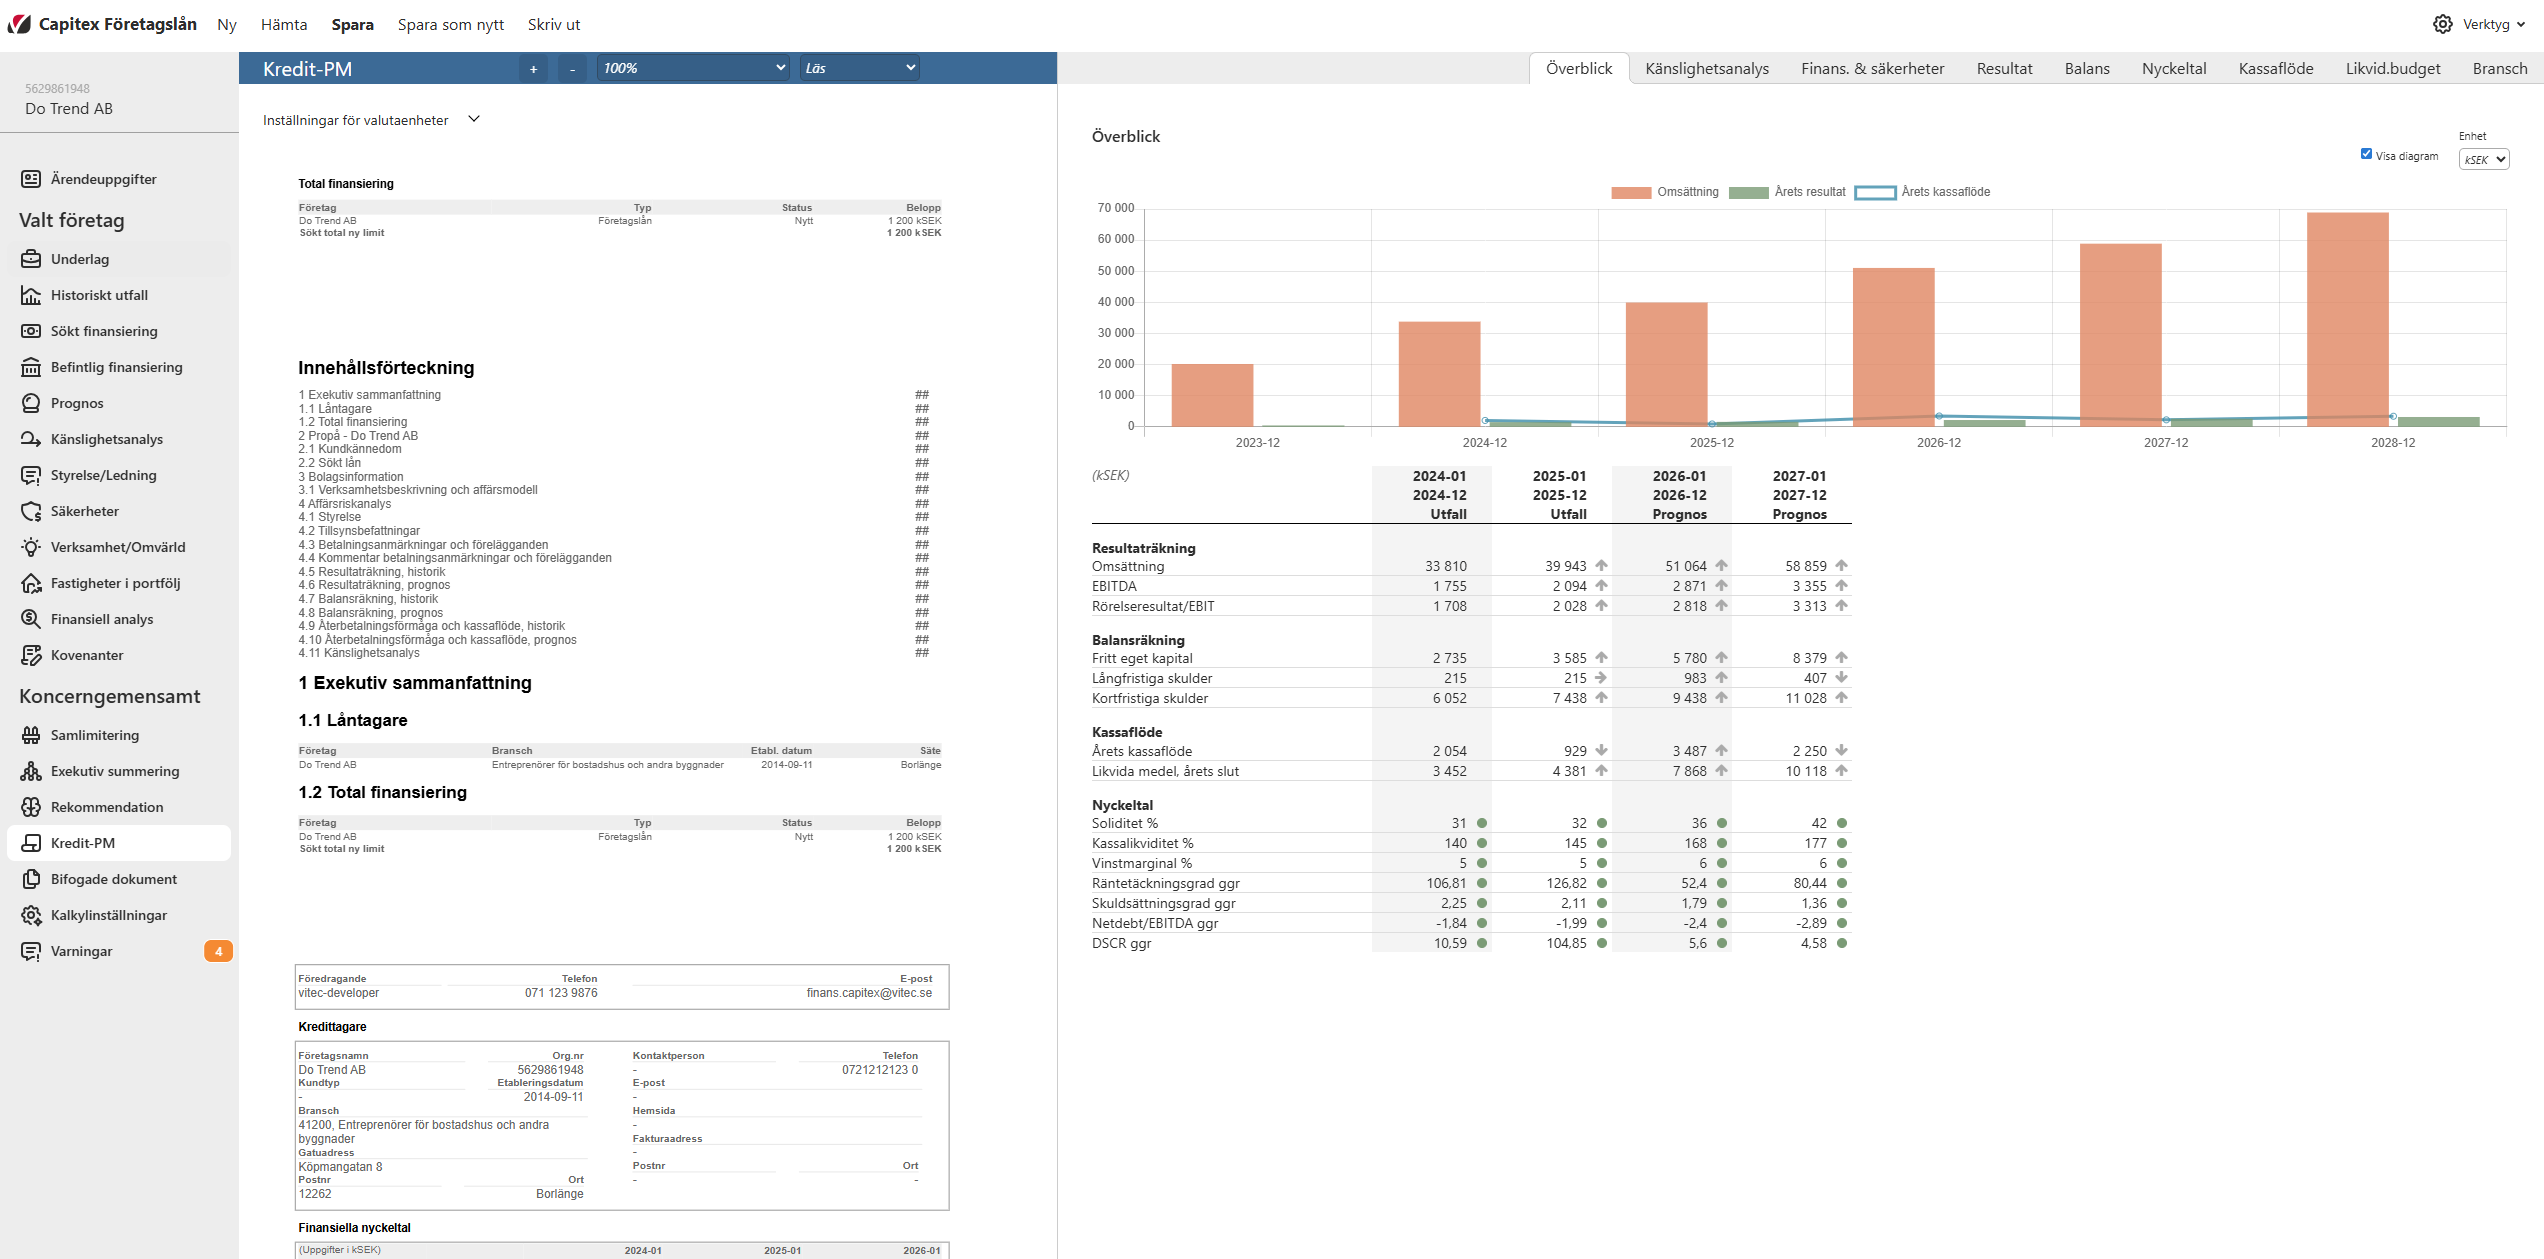
This document contains various information about the case at hand in the style of a professional financial document which can be saved as a PDF by clicking on the “Skriv ut / Print” button in the top menu.
Status
The “Status/beslut” or “Status/decision” of the case can be selected in the “Ärendeuppgifter / Case information” page:
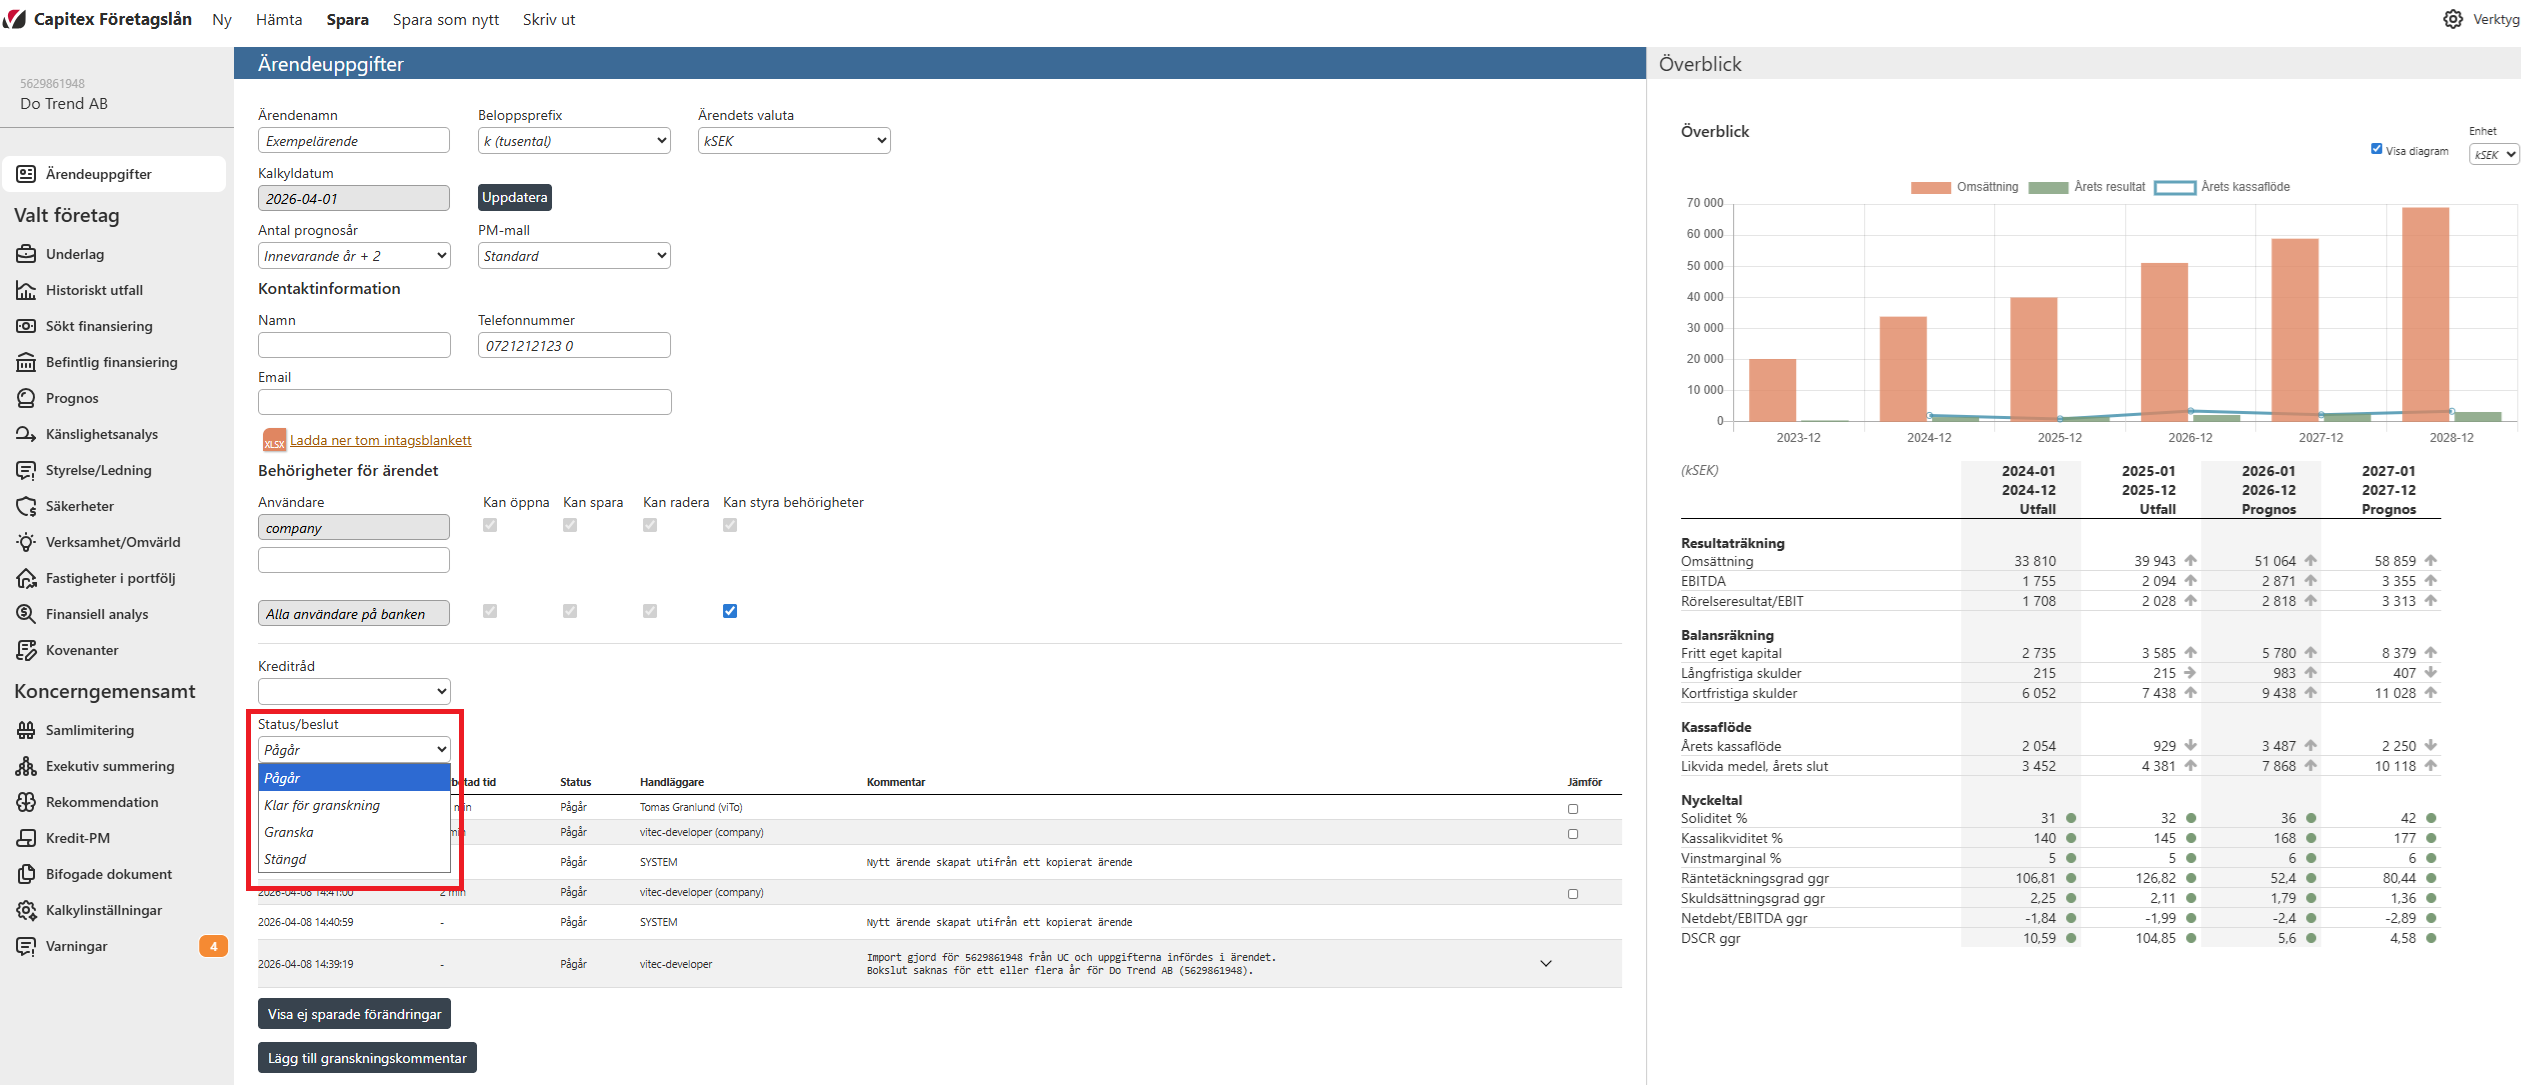
As you start a new case, the status will automatically begin as “Pågår / In progress”. This means that at this point in time, the case is still being updated with information. When you are done with the case, you can change the status to “Redo för granskning / Ready for review” and then save the case. This signals that the case is ready to be reviewed by the credit commitee, who can then open the case and change the status to “Granska / Review”. While the case has the status “Redo för granskning / Ready for review” or “Granska / Review” the case is in read only mode, meaning that no information about the case can be edited or changed apart from the status. When the credit commitee is finished reviewing the case, they can set the status to a number of options:
“Beviljas / Granted” - The applied loan has been granted.
“Avslag / Rejected” - The applied loan has been rejected.
“Komplettera / Complete” - Further information is needed to make a decision, if this status is selected then the case stops being in read only mode and should be reopened. It is possible to leave comments all over the application. At the bottom of every page there is a button “Lägg till granskningskommentar / Add review comment” in order to relay information about why a certain status was selected.
“Stängd / Closed” - The case has closed without any action.